Creating a Thumbnail Flow Animation with GSAP MotionPath
This experiment was inspired by a motion study shared by Rron Berisha. While recreating the idea for the web, I became interested in how GSAP’s MotionPath plugin could be used to create fluid transitions between different gallery states using only a few control points.
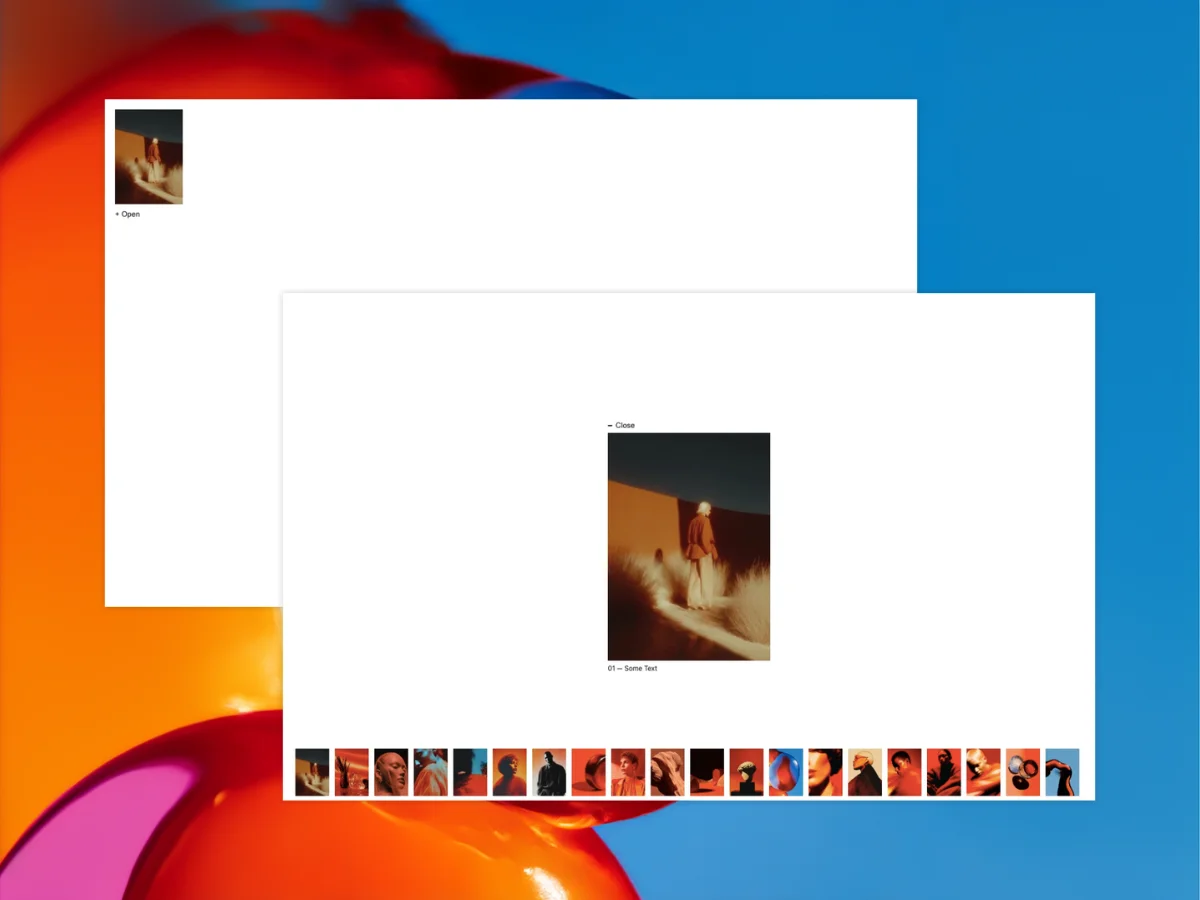
In this tutorial, we’ll build a simple proof-of-concept image gallery where a stack of overlapping thumbnails expands into a vertical image strip that reveals a featured image. The gallery itself isn’t intended to be fully functional. Instead, the goal is to explore how a small amount of motion-path logic can create a surprisingly organic transition.
The effect relies on GSAP’s MotionPath plugin, allowing each thumbnail to follow a curved trajectory rather than moving directly from one position to another. By defining only a couple of points per image, we can create motion that feels much more dynamic than a standard position tween.
HTML Structure
The HTML is intentionally minimal. We have an open button, a featured image container, and a collection of thumbnail elements.
Each thumbnail contains an image and a numeric label. Initially, all thumbnails sit on top of one another, forming a compact stack. Once the interaction is triggered, they spread into a vertical strip positioned beside the featured image.
<button class="open__btn">+ Open</button>

<div class="big__featured__container">
  <button class="close__btn">Close</button>
</div>

<div class="thumbnail">
  <p class="number">01</p>
  <div class="thumbnail__image">
    <img src="./public/img-1.webp" alt="" />
  </div>
</div>
Positioning the Thumbnail Strip
Before animating anything, we need to determine where the thumbnails should end up. We measure one thumbnail, calculate its scaled dimensions, and determine the final position of the vertical strip.
Because the thumbnails scale down during the animation, we need to compensate for the lost width when calculating the final X position.
const scaledWidth = this.thumbnailRect.width * this.scale;

this.targetX =
  this.vw -
  this.thumbnailRect.right +
  (this.thumbnailRect.width - scaledWidth) / 2;
Next, we calculate a vertically centered position for the strip.
this.targetY =
  (
    this.vh -
    this.thumbnailRect.height * this.scale +
    this.thumbnailRect.top -
    this.gap * 2
  ) / 2;
This gives us the anchor position from which every thumbnail’s final location will be calculated.
Creating the Motion Path Animation
The most interesting part of the effect happens inside the MotionPath configuration. Each thumbnail receives its own destination within the strip, but the movement itself is defined by only two points.
First, we calculate the final Y position for each thumbnail. The image index determines its location within the strip.
const targetYItem =
  this.targetY -
  index * (this.thumbnailRect.height * this.scale + this.gap);
Once we know the final destination, we can define the motion path itself.
return {
  path: [
    {
      x: this.targetX * 0.95,
      y: -targetYItem * 0.095,
      scale: (1 - this.scale) * 0.25 + this.scale,
    },
    {
      x: this.targetX,
      y: -targetYItem,
      scale: this.scale,
    },
  ],
  curviness: 0.45,
};
The second point represents the thumbnail’s final destination in the strip. The first point acts as a temporary waypoint, creating a subtle overshoot before the image settles into place.
What’s interesting is that every thumbnail shares the same path definition, but each one receives a different final Y position. Because of that, GSAP generates slightly different curves for every image. The intermediate waypoint is calculated from each thumbnail’s final position. As a result, thumbnails that end further down the strip are temporarily displaced more before settling into place, producing larger motion arcs.
The result feels much more organic than a standard position tween, even though the setup itself remains remarkably simple.
Building the Timeline
Once the path is defined, we can combine everything into a single GSAP timeline.
The open button fades away while the thumbnails travel toward their new positions.
this.tl = gsap.timeline({
  defaults: {
    duration: 1.2,
    ease: 'expo.inOut',
    easeReverse: true,
  },
  paused: true,
});

this.tl.to(this.btnOpen, {
  opacity: 0,
  duration: 0.5,
});

this.tl.to(
  this.thumbnails,
  {
    motionPath: (index) => {
      // ...
    },
    stagger: {
      from: 'start',
      each: 0.02,
    },
  },
  '<'
);
At the same time, the numeric labels animate into view.
this.tl.fromTo(
  this.numbers,
  {
    opacity: 0,
    yPercent: 50,
  },
  {
    opacity: 1,
    yPercent: 0,
    stagger: 0.045,
  },
  '<'
);
Finally, the featured image fades and scales into view.
this.tl.to(
  this.featuredContainer,
  {
    scale: 1,
    opacity: 1,
  },
  '<'
);
Conclusion
What makes this effect interesting is how little is actually required to create it. A couple of motion-path points and a few simple measurements are enough to transform a static stack of images into something that feels much more alive.
The demo itself is intentionally simple, but the underlying idea can be pushed much further by experimenting with different path shapes, stacking directions, scales, and stagger configurations.
Don’t forget to check out the other demo variations included in the project. While this demo starts from a stack of overlapping thumbnails and expands into a vertical strip, some of the other examples begin with horizontal image strips and explore completely different MotionPath configurations.
I hope this tutorial gives you a few ideas for your own GSAP MotionPath experiments. Thanks for reading 😃